Steve`s Country
For a smile as wide as a country sunrise
Steve’s DIY Project #1.

Hi everyone and welcome to something sort of new for Steve’s Country. Though I did do a DIY before but hopefully I will be a bit more regular with some ideas. Perhaps once a month anyway. Today’s DIY is really something for fall which I wanted to post a month ago, but this and that came along and it never happened. So, fall being done up here in the north, it seems a bit odd to post this, however, fall is still happening in some places so I’m not completely out of date. But it will show what a person can do for decorating that doesn’t really have much, if any, cost to it. Mostly I only used items I had on hand, leftover things from other projects and only bought one new item to use, the urethane to spray it with at the end. So, here we go… First I gathered up some scrap pieces of wood I had laying around and then glued them together.


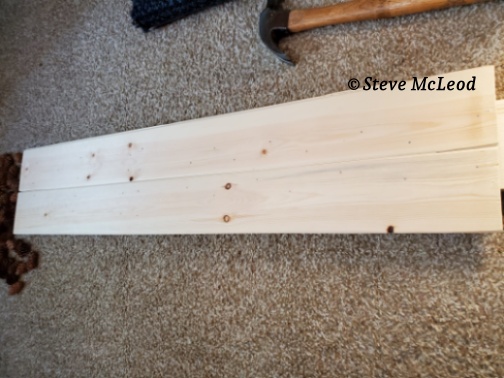
I also used some small 3/4 inch finishing nails to hold it together a bit better, helps until the glue dries. Then I did a bit of sanding with some fine sandpaper, which I always have on hand. It only requires a little sanding, by hand. No major electrical tools needed here with this project.
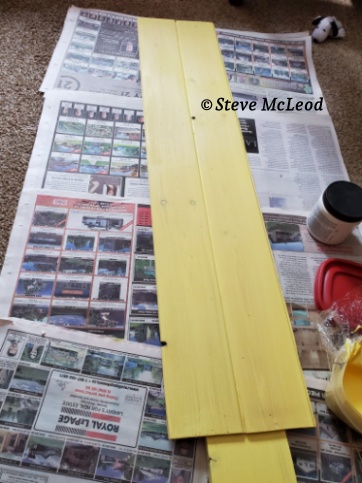
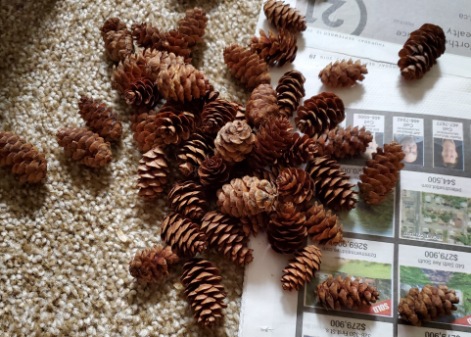
Then I painted it with a yellow acrylic paint, only one coat as I wanted the grain of the wood to show. I chose a light yellow since it is a fall project and it fits nicely with the balsam cones I used. After the paint was good and dry I sanded it a bit to really allow the grain to show nicely. On one of my walks I picked up some balsam cones to use for this project, shown above. Balsam trees are like spruce trees, though they really smell much nicer. And they always produce lots of cones. I picked out the ones I wanted and placed them on the wood making out the words “Happy Fall”.
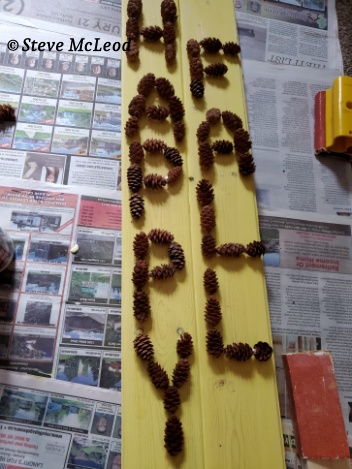

I just did this free hand because I was looking for a nice home made look sign. Then I used some wood glue, which I have on hand always as well, to glue them all in place.
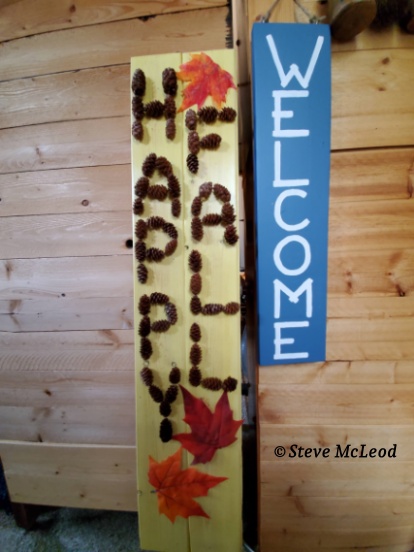
I let this dry until the next day then took it outside to spray it with urethane for added protection and give it a bit of a shine too. I used a glossy finish urethane. This is not good to use indoors, always use outside. Once dry I glued some colorful plastic leaves on it and there it is. All finished and the only cost was the urethane, but there’s lots of that left for other projects too, so the cost is really very little. It can be set outside or used indoors. Hope you enjoyed this easy little project, have a wonderful day and God bless!
Steve and Muffin.
©2020 Steve McLeod.

Love this!.
Fall has such beautiful colors.
LikeLiked by 1 person
Hi Tiffany! Thanks so much, glad that you liked it! Yes, fall is so full of beauty!
I hope you are having a great day!😃😸🌞
LikeLiked by 1 person
Excellent
LikeLiked by 1 person
Thank you Sheree!
LikeLiked by 1 person
Very smart and a welcome to anyone .
LikeLiked by 1 person
Thank you so much!
LikeLiked by 1 person
Wow! This is great!
LikeLiked by 1 person
Thank you very much!😀😺
LikeLike
Wow, Steve, you just amazed us 😍 You got so much skills, wow, now I see why you get sore 🤔☺️This is a fantastic work for fall. 💐
I can’t be around lately, I’m sorry, I had to take care of a serious thing now, and I’ll be offline for few days.🥺 I’ll tell you when I feel better. Have a lovely week Steve 🤗🤗
LikeLiked by 1 person
I hope it’s nothing serious Simon, take care of yourself! Thank you so much too!😁😸☕☕
LikeLike
I’m good now Steve, Thanks a lot🤗
My Father in law left us all last night😔
I was quiet upset and decided to be offline for a while. Now feeling better.
LikeLiked by 1 person
I’m sorry to hear that Simon, really.😔 Your wife will likely feel it for a while yet, I’ll pray for you both. And my condolences to everyone.😯😥
LikeLike
Thanks a Lot dear Steve ✨ This will stay in my heart forever
LikeLiked by 1 person
You’re welcome, friends stay with friends.🙂😺
LikeLiked by 1 person
and you are awake😳 it’s late i think .,🤔
LikeLiked by 1 person
Yes, I’m signing off, worn out tonight. I didn’t do much today but it wore me out. Good night Simon!😴🌙Have a great day!😀😺🌞
LikeLiked by 1 person
Good Night Steve ,✨🤗
LikeLiked by 1 person
Very creative Steve! It looks really nice! Perfect for autumn 🍂😉
LikeLiked by 1 person
Thanks Ribana!😀😺🍁🍂
LikeLiked by 1 person
I see you are artistic too ! Great design ! Rest well both of you !☕️☕️😻🙂
LikeLiked by 1 person
Thanks, I hope so. Have a good night as well!😀😺🌙😴
LikeLike
It’s beautiful 😍
LikeLiked by 1 person
Thanks so much Saba!😃😺🌞
LikeLiked by 1 person
😺🤗😊😍
LikeLiked by 1 person
AWESOME!!! I was looking for some designs!!!!!
LikeLiked by 1 person
Thank you Maryam!
LikeLiked by 1 person
No problem-o to my favourite blogger😊😊 Or should i say bloggers😏😏😼😼
LikeLiked by 1 person
Good thing you added me in there just in time!😳😹😹
LikeLiked by 1 person
Don’t worry i’d never forget Muffin even if i forget steve over here😂😂😂😳😳😹😹
LikeLiked by 1 person
Who’s Steve?🤔😳😹😹
LikeLiked by 1 person
Woww🤣🤣 Talk about comedy! Give him a sore feet from me Muffin😨😨😹😹🤭🤭
LikeLiked by 1 person
Meow, meow=Okay, here goes…😼😹
AAAAAAAA!!!!!!😲😳
LikeLiked by 1 person
Woww! Oops looks like i ran out of popcorn😂🤣
LikeLiked by 1 person
I’m outnumbered. Sigh.🙄🙄😹😹
LikeLiked by 1 person
Woww won again Muffin! (like every time🤣🤣)
LikeLiked by 1 person
Hi Maryam! Having a good time with school?😁😺
LikeLiked by 1 person
NOT AT ALL! I always come first in the class and in the first layer of exams i came THIRD! I just hope i come first again in my second layer of exams in December1
LikeLiked by 1 person
Keep studying Maryam, I know you can do it!😁
Meow, meow!=Me too!😺😸
LikeLike
Thanks soo much! i feel more motivated to studying now!
LikeLiked by 1 person
Great, I’m behind you all the way!😁
Meow, meow!=Me too!😺😻
LikeLiked by 1 person
😻😻😻😊😊
LikeLiked by 1 person
And my birthday is on Monday (23 November) so i will post a blog about it😁😁
LikeLiked by 1 person
Oh good, looking forward to it! Happy early Birthday Maryam!!😀🥳🥳
Meow, meow!=Me say Happy Birthday too!😺😻
LikeLiked by 1 person
Awww thanks! It’s always nice to get a Happy birthday greet in advance!
LikeLiked by 1 person
I agree with that!😃😺
LikeLiked by 1 person
😁😁😁😁
LikeLiked by 1 person
HAPPY BIRTHDAY TO YOUOUOUOUOUOUOU!!🥳🥳🥳🥳🥳🥳
MEOW, MEOW, MEOWOWOWOWOWOW!😻😻😸😸🎇🎆🎉🎊🎈
LikeLike
Have a nice day too!😀😺🌞
LikeLiked by 1 person
Sure will 😉
LikeLiked by 1 person
Written by #StevesCountry
[ ]
Steve’s DIY #Project
https://flip.it/p8coVM via #Outosego | #Publisher at @Flipboard & #Flipboard #NYC #USA
…
LikeLiked by 1 person
How creative and talented you are, Steve! I love your fall DIY! 🍂 🍁☕️☕️😺
LikeLiked by 1 person
Thank you very much Eugenia! Have a wonderful afternoon!😀😺🍁🍂
LikeLiked by 1 person
Most welcome!
LikeLiked by 1 person
Great project Steve!
LikeLiked by 1 person
Thank you very much Correne!
LikeLiked by 1 person
Awesome work Steve! 👌
LikeLiked by 1 person
Thank you very much Suni!😁😸
Have a great evening!
LikeLiked by 1 person
Have a great day with fun Steve 😀
LikeLiked by 1 person
Thanks Suni!😀😺
LikeLike